Okay, so *yesterday* something wild happened in the studio. A client walks in, holding this swimsuit bottom she’d bought online. Now, you know I’ve seen some things in my day, but this? This took the cake. She tries it on, and I swear, the bottom looked like a *diaper*. A *WIDE* diaper! You know what I mean, right? Like, absolutely unflattering. We’ve all been there, staring at a swimsuit that promises sunshine and rainbows and delivers…well, not that.
So, the question is: what do you do when your online swimsuit dreams turn into a diaper-butt nightmare? Don’t despair! We’re gonna fix this. Consider this your DIY swimsuit surgery.
The Case of the Misbehaving Bottom
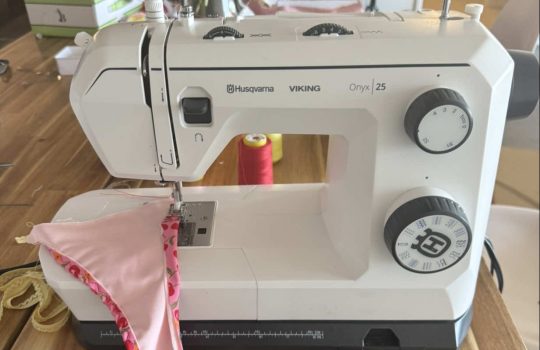
First, a little diagnosis. This particular bottom, bless its heart, was a full *8 inches* wide in the back. The goal? To bring that down to a more flattering 5 inches – what I like to call the “pro cut.” Now, this isn’t rocket science, but a little precision goes a long way.
Here’s the deal:
- Identify the Problem: Is it just the width in the back? Or is the rise too long? Maybe the leg holes are gaping. Pinpoint exactly what’s making it look…diaper-ish.
- Measure Twice, Cut Once (Seriously!): This is the golden rule of tailoring. Mark the desired width on each side, ensuring everything is even. We don’t want a lopsided situation.
- Draw Your Lines: Use a fabric marker or chalk to draw a clear line where you’ll be cutting. Take your time!
- The Cut: Okay, deep breath. This is it! Carefully cut along the lines you’ve drawn. Remember, you can always take *more* fabric off, but you can’t put it back!
My Personal Philosophy on Swimsuits and Body Positivity
Now, before we go any further, let me be clear: I believe *every* body is a swimsuit body. No exceptions. However, if a swimsuit makes you feel uncomfortable or self-conscious, it’s not doing its job. It’s there to help you feel confident and ready to rock that beach!
I’ve been altering swimsuits for years now, and I’ve learned that sometimes, even the best designs just need a little tweak to fit *your* unique shape. Online shopping can be a gamble, and fit varies wildly from brand to brand. Don’t let a poorly fitting swimsuit get you down. A little alteration can make all the difference.
And speaking of feeling good in your skin, this reminds me of a post I saw on Political and Social Trends about embracing body diversity. Check it out, it’s super inspiring!
From Diaper to Dream: The Sewing Magic
Once you’ve made the cut, it’s time to break out the sewing machine (or needle and thread, if you’re feeling particularly patient).
- Pin It: Pin the new seam together, right sides facing.
- Sew It: Use a zigzag stitch to sew along the new seam. This allows for stretch and prevents the seam from popping when you move.
- Trim It: Trim the excess fabric close to the seam.
- Serge or Zigzag Finish: If you have a serger, use it to finish the raw edge of the seam. If not, a zigzag stitch will do the trick to prevent fraying.
- Press It: Press the seam open for a clean finish.
Troubleshooting and Common Pitfalls
Okay, let’s be real. Sometimes things don’t go according to plan. Here are a few common problems and how to fix them:
- Seam Puckering: This usually happens if the fabric is stretched too much while sewing. Try easing the fabric as you sew, or use a walking foot on your sewing machine.
- Lopsidedness: Double-check your measurements and make sure you’re cutting evenly on both sides. A little adjustment can usually fix this.
- Tight Leg Holes: If you’ve taken too much fabric out of the leg holes, you can add a small gusset of fabric to give them more room.
And just because, here’s something hilarious I found in Humor/Meme Section to lighten things up!
The Final Reveal
Now, try on your newly altered swimsuit bottom. Does it fit better? Does it make you feel more confident? If so, then congratulations! You’ve successfully avoided the dreaded diaper butt.
If it still needs a little tweaking, don’t be afraid to make further adjustments. The key is to keep experimenting until you achieve the perfect fit.
The Takeaway
Don’t let ill-fitting swimsuits ruin your summer. With a little bit of know-how and some basic sewing skills, you can transform those online shopping fails into wardrobe wins. Remember, the goal is to feel confident and comfortable in your own skin. And if a little DIY swimsuit surgery helps you get there, then go for it! And feel free to show off your amazing new look with these Design Style Outfits
so I had a client walked in yesterday and she bought her suit onlineand when she received it she tried it on and the bottom fit like a diaperit was so wildlook very very wild 😜 WIDEso let’s see how we can help herso this bottom measure is about 8 inches width here on the backand we want to make it 5 inches which is the pro cutso in order to do this we just have to cut it first narrowerbut let’s just first draw the lines and make sure that everything is goodeverything is even from both sides and then we’ll cut itvideo