
Blog
#Finding Your Perfect Fit: A Guide to Bra Cup Integration
Jun
Hey there, friend!
Have you ever felt like your clothes just aren’t *quite* sitting right? Or maybe you’re dreaming of a custom dress with built-in support that feels like a second skin? I get it! As someone who loves fashion and believes feeling comfortable is key, I’ve been on that journey myself. Today, let’s explore incorporating bra cups into your garments, a secret weapon for achieving that perfect silhouette.
(Primary Keyword: Bra Cup Integration)
(Secondary Keywords: Sewing Bra Cups, Built-in Support, Custom Clothing)
The Beauty of Bra Cup Integration
Integrating bra cups offers so much freedom! Whether you’re sewing a slinky summer dress, designing a supportive swimsuit, or even just want to add some structure to a favorite top, this technique can be a game-changer. It’s all about celebrating your unique shape and feeling confident in what you wear.
Here’s why I think bra cup integration is so fabulous:
- Custom Support: Ditch the strapless bras that dig and pinch! You get to choose the level of support and the perfect cup size for *your* body.
- Seamless Silhouette: No more visible bra lines disrupting the smooth flow of your clothing. The cups become part of the garment.
- Creative Freedom: Unleash your inner designer! You’re no longer limited by what’s available in stores. Create clothing that truly reflects your personal style and fits you flawlessly.
- Comfort is King (or Queen!): A properly integrated bra cup is incredibly comfortable. Say goodbye to constant adjustments and hello to all-day ease.
Getting Started: A Friendly Guide
Okay, so you’re ready to dive in? Amazing! Here’s a simplified version of the bra cup integration process, inspired by some awesome tutorials I’ve seen (and adapted from my own learning curve!):
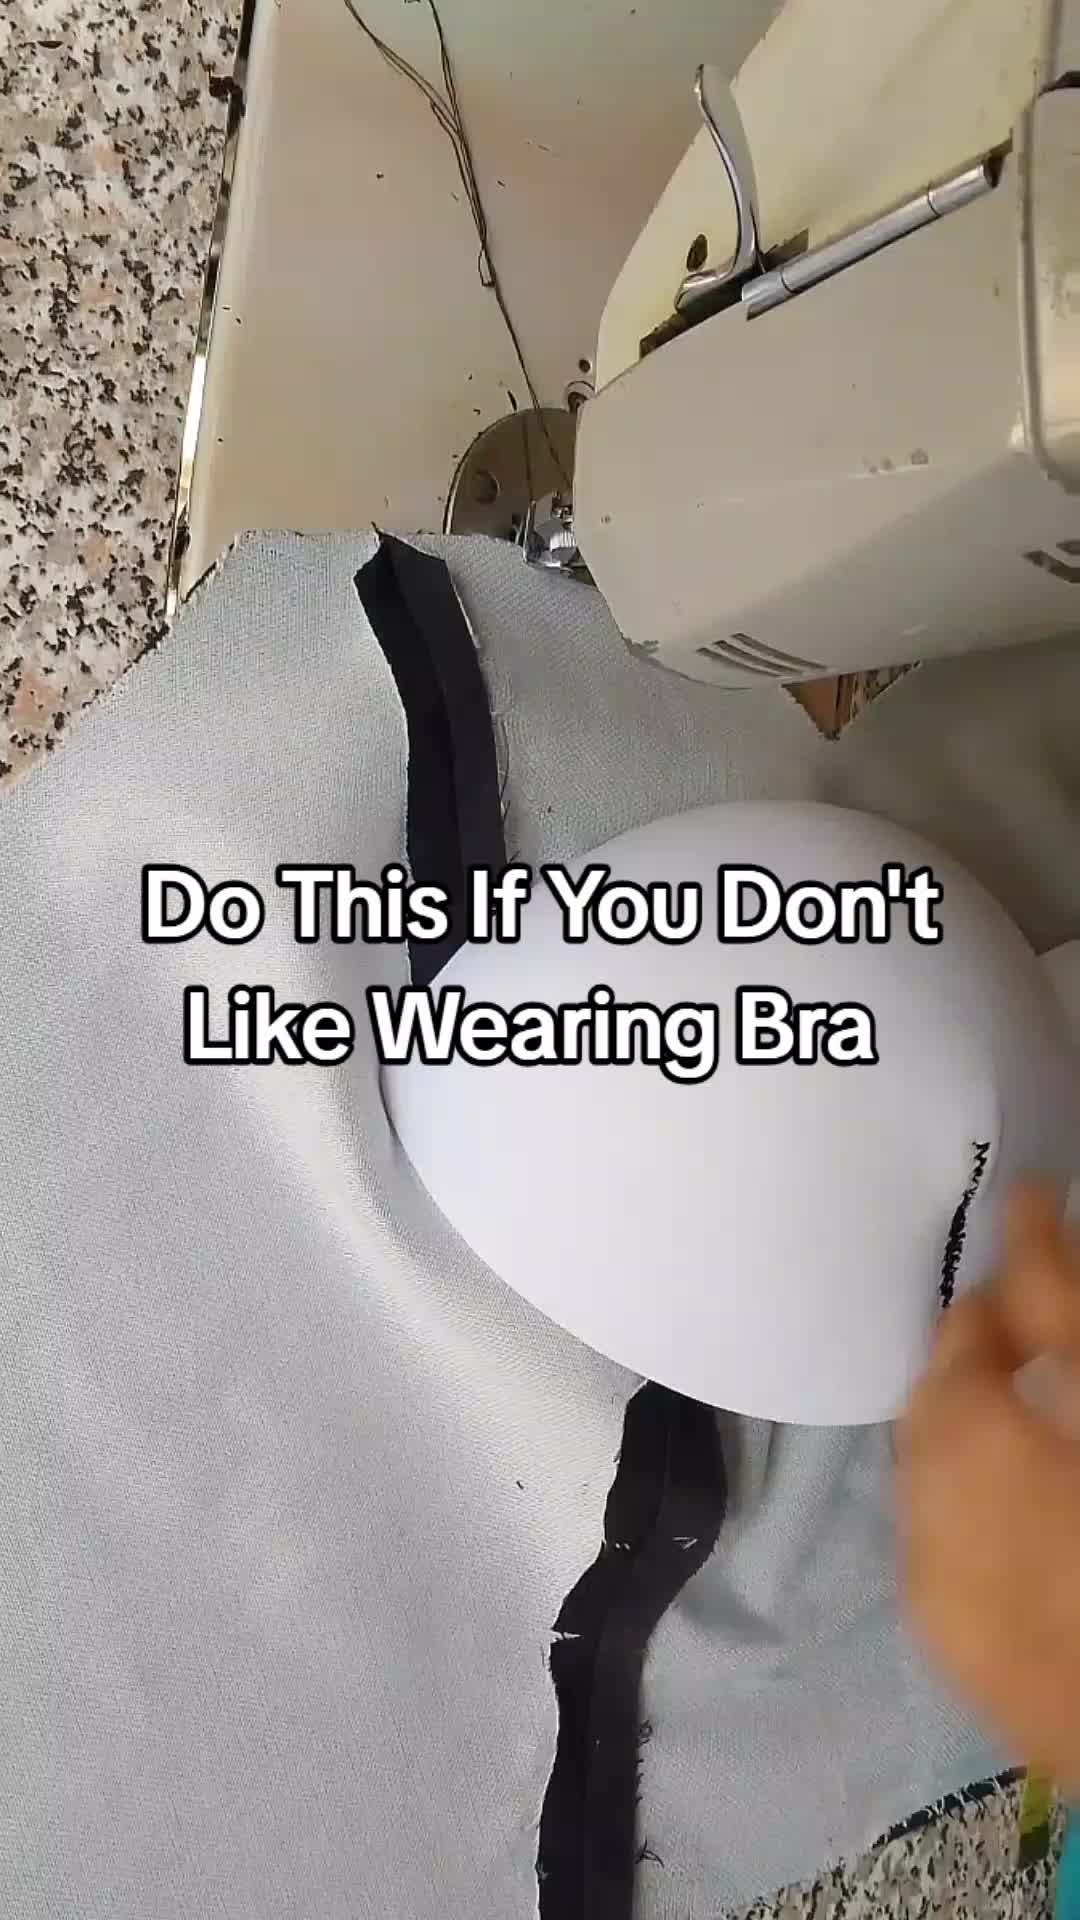
- Open the Seam: Very first, you need to open the seam. This provides an access point to work within the garment.
- Prepare the Bra Cup: The wrong side of your bra cup should face the wrong side of your garment lining. This ensures a smooth, invisible finish on the outside.
- Pin it in Place: Pin the bra cup to the underbust of the garment lining. Take your time here. Arrange it carefully to achieve the desired shape and support. This step is crucial for a good fit!
- Push and Secure: Push the lining into the bracket or designated area. Pin it down to keep everything in place.
- Align and Stitch: Ensure the other part of the bra cup aligns with its counterpart on the opposite side. Stitch along the existing stitch line (if there is one). The goal is to make your stitches invisible from the outside.
- Finishing Touches: Once stitched, you can now place your fabric over the bra cup or proceed with any further embellishments or alterations.
Tips from a Fellow Fashion Enthusiast
Let me share some personal wisdom from my own sewing adventures:
- Choose the Right Cup: Experiment to find the bra cups that suit your shape and the garment you’re making. I’ve had good luck with affordable options from Joann Fabrics (they often have sales, keep an eye out!). You can often find basic molded cups for around $5-10 a pair. The quality is decent for practice and everyday wear.
- Practice Makes Perfect: Don’t be afraid to practice on scrap fabric! It’s a great way to get comfortable with the technique and avoid mistakes on your final project.
- Consider the Fabric: Think about the weight and stretch of your fabric. Heavier fabrics may require more structured cups, while lighter fabrics might need softer, more flexible options.
- Embrace Imperfection: Seriously! Don’t beat yourself up if your first attempt isn’t flawless. Every sewing project is a learning experience. My first attempt looked like a rumpled mess, but I learned so much from it!
- Explore Different Styles: Don’t limit yourself to basic cups. There are push-up cups, padded cups, and even molded cups with underwire. Each offers a different level of support and shape.
- Watch Tutorials: Video tutorials can be incredibly helpful. Look for ones that show the process step-by-step and explain the reasoning behind each action.
Beyond the Basics: Expanding Your Style Horizons
Bra cup integration opens a whole new world of possibilities. Imagine creating:
- A flowy maxi dress with built-in support: Perfect for summer evenings, you can dance the night away without worrying about uncomfortable straps.
- A supportive swimsuit: Customize the coverage and support to flatter your figure and feel confident at the beach.
- A comfortable and stylish top: Add bra cups to your favorite patterns for a perfect fit that moves with you.
- Add some design style to make it look amazing
A Final Word of Encouragement
Ultimately, bra cup integration is about empowering you to create clothing that makes you feel amazing. It’s about celebrating your body, expressing your creativity, and embracing the joy of making something truly unique. So, grab some fabric, find some bra cups, and let’s get sewing! I’m cheering you on every step of the way.
Happy Sewing!
First thing you have to do is to hire and open the seam.Okay. Then you take your bra cup.The wrong side of your bra cup is going to be facingthe wrong side of your lining.Now pin the bra cup to your under bossed.Okay? Pin it to your under bossed and arrange it well.Now when you’re done arranging,push the lining into the bracket.Push it into the bracket. Then you pin it down.When you’re dumping it,ensure the other part of your bra cup aligns with the other one.They are going to be stitching on that stitch line.Okay? You can see where I stitched so that your stitch,your stitch is not going to be visible.So this is what is going to look like when you are done.Then you can now place your fabric on it or just do anyhow you want.I have a video on how I stitched my bra cupif you don’t know how to do that.I’ll see you guys next time. Bye.video
Officials En Cada Ruptura Del Corazon Nos Nacen Alas Para Volar En Otra Direccion Premium T Shirt Sweatshirt Hoodie
Officials Emblem Of The Conqueror Premium T Shirt Sweatshirt Hoodie
Officials Elton John And Kiki Dee Dont Go Breaking My Heart Premium T Shirt Sweatshirt Hoodie
Officials Elsa Olaf Frozen Starry Night Vincent Van Gogh Let It Gogh Let It Gogh Premium T Shirt Sweatshirt Hoodie