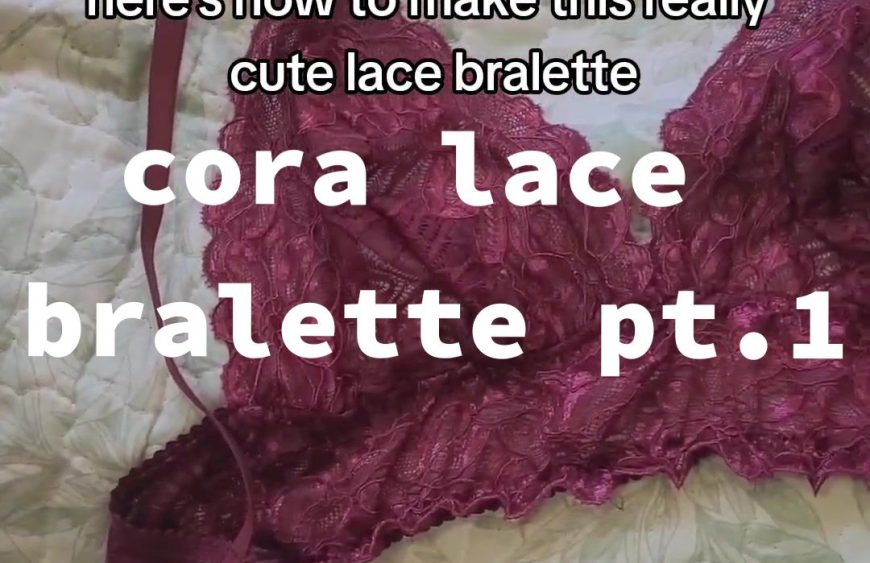
Embracing your unique style and feeling empowered through fashion is all about finding garments that make you feel confident, comfortable, and authentically you. One such piece that can truly make a difference is a custom fit lace bralette. I remember the first time I made my own bralette. It was a liberating experience – finally, a piece that fits perfectly, feels comfortable, and was crafted with love by my own hands.
Today, I’m sharing a step-by-step guide on how to make a stunning lace bralette. With my *free pattern* available in sizes from extra small to extra extra large, you can be sure of a fit that celebrates your unique beauty.
Materials You Need
Before we start, gather the following materials:
- Lace fabric: The fabric is the game-changer here. I love the intricate beauty of lace that adds a touch of elegance. Make sure to choose a quality lace that feels comfortable against your skin.
- Picot elastic: This will give the bralette more support, especially under the bust.
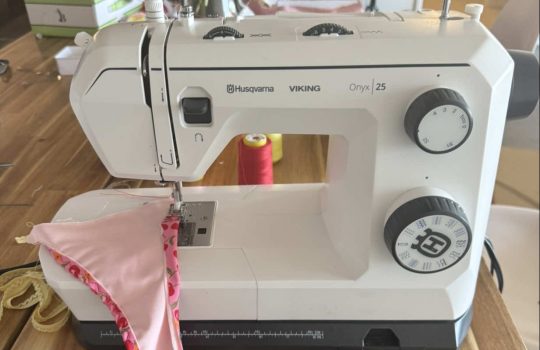
- Sewing machine: A reliable machine with a zigzag stitch option is key.
Remember, the bralette you create should reflect your personal style. Whether you prefer vibrant colors, pastels, or classic black or white, choose a lace fabric that speaks to you.
Sewing the Lace Bralette
Now let’s dive into the process. It may seem daunting at first, but trust me, with a little patience, you can create a beautiful custom fit lace bralette.
1. **Fold your fabric:** Start by folding your lace fabric in half. Take your pattern pieces and place them on top of the folded fabric.
2. **Sew the cups:** Place the cup pieces right sides together and sew the edge with a zigzag stitch. Ensure there are no holes – you can sew twice if necessary!
3. **Attach the cups to the band:** Now, it’s time to sew the cups to the band. Remember to place them right sides together.
4. **Add elastic for support:** To give the bralette more support, we will add the Picot elastic to the underbust. Place the elastic with the Picot detail facing down and sew it with a zigzag stitch. The pattern comes with a recommended length of elastic for each size, but you can also measure it under your bust for a precise fit.
5. **Secure the elastic:** Fold the elastic down and top stitch it in place. Be sure to spread the lace so you don’t sew on top of any folds.
A Personal Touch to Your Wardrobe
Congratulations, you’ve just created your own lace bralette! This is not just a piece of clothing, but a testament to your creativity, your style, and your unique beauty.
Remember, fashion is a form of self-expression. As you navigate your style journey, don’t be afraid to experiment and try new things. Whether it’s pop culture, political and social, humor or meme, seasonal event, nostalgia or retro, local pride, design style, or sports influences, your fashion choices should resonate with you.
Stay tuned for part two of this DIY series where we will be exploring more ways to add a personal touch to your wardrobe. Until then, keep exploring, keep creating, and above all, keep celebrating your unique beauty through fashion.
here’s how to make this really cute lace bralette I actually made a free pattern for everyone so go to my website to get yours it comes from sizes extra small to extra extra large and illustrated instructions so for the materials you need now let’s get to it start by folding your fabric in half and placing your pattern pieces on top of it now we will sew the cups place them right sides together as I’m showing in the video and sew the edge with a zigzag stitch make sure to leave no holes in it. if you need, sew twice now sew the cups to the band right sides together, as I’m showing in the video to give you more support we will add elastic to the under bust place the Picot elastic with the Picot detail facing down and sew it with a zigzag stitch the pattern comes with a recommended length of elastic for each size but you can also measure it under your bust now fold the elastic down as I’m showing in the video and top stitch it in place make sure to spread the lace so you don’t sew on top of any folds now follow for part two <3video