
Blog
Swimsuit SOS: How I Rescued Ill-Fitting Bottoms (and You Can Too!)
Jul
Alright, friends, let’s talk swimwear. Finding the *perfect* fit can feel like searching for a unicorn riding a bicycle. You know the struggle – that awkward gap in the back, the dreaded muffin top, or bottoms that just plain swallow you whole. Recently, I tackled one such swimwear saga, and I’m here to share the deets so you can save your own summer style!
The Case of the Overly-Long Swim Bottoms
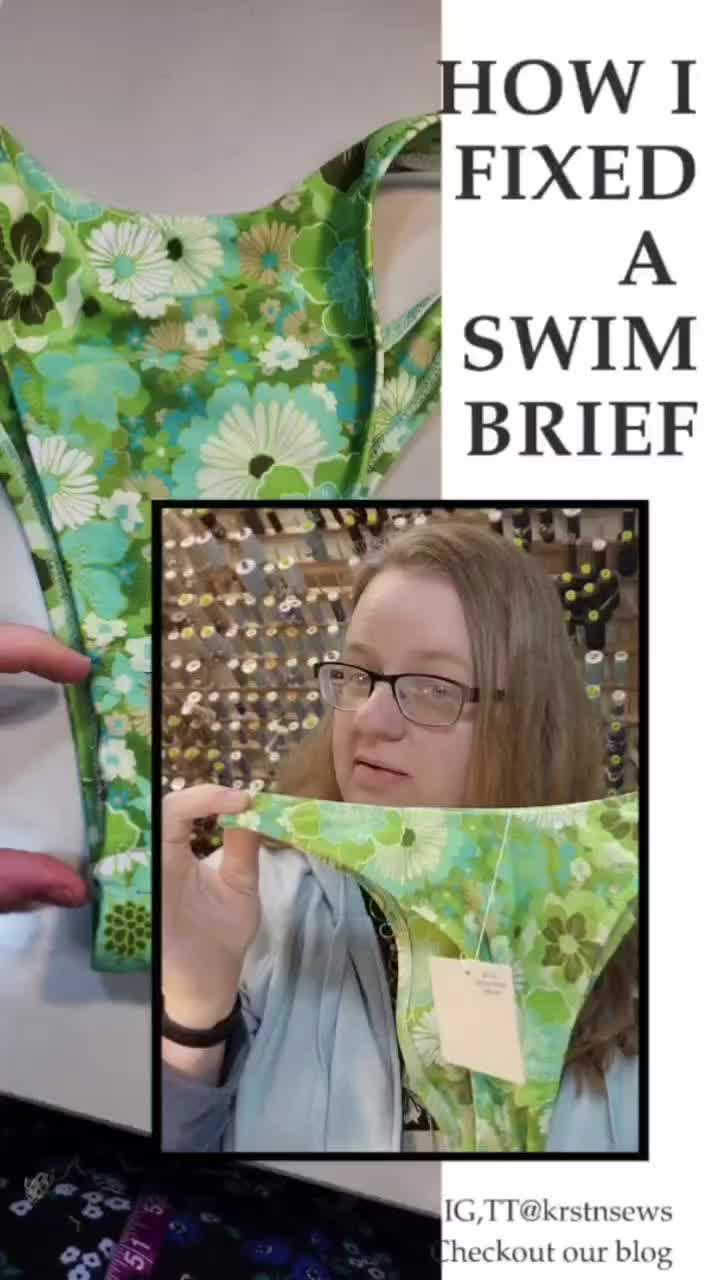
My client brought me a pair of swim bottoms that were, to put it mildly, *challenging*. The waist fit, but the length? We’re talking three inches too long! Seriously, it was like they were designed for someone with a torso twice the size. And let’s be real, who needs that?
Dissecting the Problem: A Seamstress’s Perspective
So, what’s a sewist to do? Dive right in, of course! Here’s the breakdown of my alteration process:
- Deconstruction: First, I carefully seam-ripped the zigzag stitching that secured the elastic along the sides. Then, I separated the front of the garment from the back at the crotch. It’s like performing swimwear surgery – gotta be precise!
- Length Reduction (Back Only): This is where the magic happened. I decided to shorten the bottoms from the back, keeping the front intact to maintain the original shape.
- Fabric Gymnastics: The back fabric was wider than the front, leading to some bunching. To combat this, I stretched the back fabric while stitching it to the front. This is a little trick I use to ensure a smooth, even seam. Think of it like coaxing a stubborn cat into a carrier – gentle persistence wins the day!
- Seam Allowance Management: I cut out about 2 inches of seam allowance to eliminate excess bulk in the crotch area (nobody wants that!). But I left an inch, just in case I got a bit overzealous with the scissors. Better safe than sorry!
- Enclosed Seam Magic: I stitched the back pieces to the front, then tucked the seam allowance into the lining. This creates a clean, professional finish and prevents any uncomfortable rubbing.
- Stitching in the Ditch: My secret weapon! I folded the raw edge of the lining down to enclose the seam allowance and pinned it along the stitch line. Then, I stitched as close to the seam as possible – a technique called “stitching in the ditch.” It makes the stitching practically invisible on the outside.
- Elastic Reattachment: Quilt clips to the rescue! I used these handy little tools to hold the elastic in place while I re-zigzagged it to the fabric. Switching machines was necessary for the zigzag stitch.
- The Grand Reveal: And voila! The finished product! The height of the center now perfectly complements the waist measurement. No more saggy bottoms or awkward bunching.
Why This Matters: Fit Over Fashion (Almost!)
Look, I get it. We all want to rock the latest trends. But even the most stylish swimsuit will look blah if it doesn’t fit properly. A well-fitting suit flatters your figure, boosts your confidence, and lets you enjoy your time in the sun without constantly tugging and adjusting. Think of it as an investment in your summer happiness!
I often see inspiration when it comes to design, it’s something that everyone can appreciate. Check out some amazing swimsuit designs at: Design Style
My Philosophy: Embrace the Imperfect & Tailor to Perfection
I firmly believe that “off the rack” doesn’t have to mean “stuck with it.” A few simple alterations can transform a garment from “meh” to “marvelous.” Don’t be afraid to experiment, get creative, and make your clothes your own!
Plus, let’s be honest, swimwear shopping can be a *nightmare*. The lighting is always unflattering, the sizing is inconsistent, and the pressure to look “beach body ready” is immense. Taking control of the fit empowers you to say, “I’m wearing this swimsuit because *I* like it, and *I* feel good in it.”
Leveling up can mean creating your own swimsuit and finding ways to show your: Local Pride
Final Thoughts: Your Body, Your Style, Your Rules!
So, the next time you’re faced with a swimwear malfunction, don’t despair! Remember my little tale of the overly-long swim bottoms, and know that a little ingenuity (and a sewing machine) can go a long way. Embrace your unique shape, celebrate your style, and rock that swimsuit with confidence! And remember, the most important thing you wear is your own self-love!
here’s how I altered these swim bottoms to make them usable for our customerthe length was 3in too tall for her body framewhich is a bit ridiculous considering her waist measurementI seam ripped out the zigzagging that was holding the elastic down along the sidesI took the stitching apart that held the front of the garment to the backat the crotch leveland then we were taking all of the length out of the back of the garmentso I used the original seam allowance on the frontwhich is the part that’s white in this photothe back was wider and if you look it looks a little bit bunchy where the print isI stretched it to stitchand the wider fabric is down to the feed dogs so that would help pull it through fasterto match the top fabricI ended up cutting out 2in of seam allowance so that it didn’t get bunchy in her crotchbut I still left an inch in there in case it was too long somehowI had stitched the back pieces to the frontand so in this photo I’m shoving the seam allowance into the guts of the garmentso that it’s enclosed by the liningI took the raw edge of the lining down to enclose itand then pinned that fold right along the stitch lineand then I stitch as close to the seam as possible to try to be invisible on the outsidethis technique is called stitching in the ditchso that it mostly disappears in that fold of the seamon the inside it’s just a simple topstitchand then I used quilt clips to hold the elastics back into placeI had to switch machines to zigzag the elastics back down to complete the alterationhere’s the final product and honestlythe height of the center matches the proportion of the waist measurement much betterthat’s all thanks for watchingvideo
Major Jason Watson I Stand With Watson Shirts
Hulk Hogan Punkamania Is Still Runnins Wild Shirts
World Cup 2026 Apparel Goal Glory Unity Soccer Shirts
Viycwjmu Good Holy Tough Show Happens Cam Schlittler Shirts